Ryan Herrick · Youtube · 11:26

How I Edit Viral Reels in DaVinci Resolve (Full Breakdown)

An 11-minute screen-share walkthrough of the bolt method: a lo-fi pattern-interrupt clip placed before a polished Reel, edited live inside DaVinci Resolve Studio.

Posted
December 2nd 2025
5 months ago
Duration
11:26
Format
Tutorial
educational
Channel
RH
Ryan Herrick
§ 01 · The Hook

The bait, then the rug-pull.

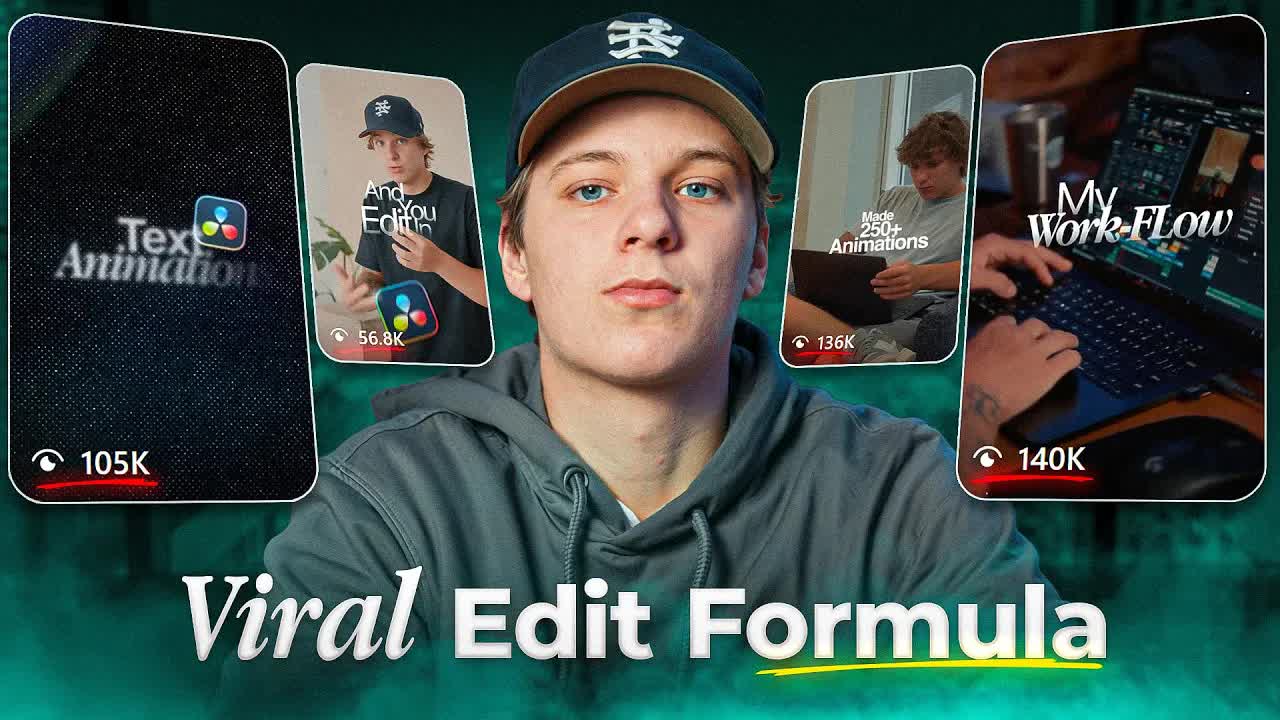
Four seconds of absurdity filmed on a phone can out-hook a polished talking-head Reel — and Ryan Herrick built a repeatable DaVinci Resolve workflow around exactly that idea.

§ · Chapters

Where the time goes.

00:00 – 01:00

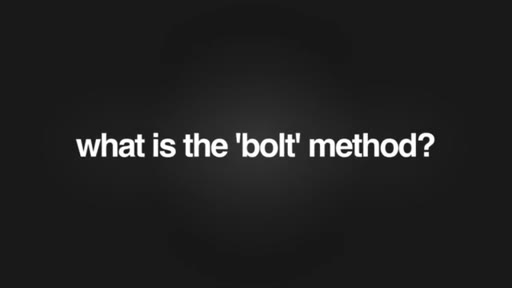
01 · What is the Bolt Method?

Hook with reel examples on screen; names the bolt concept and promises a live walkthrough inside DaVinci Resolve.

01:00 – 01:55

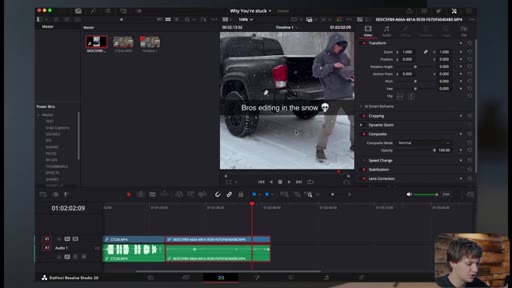
02 · Bolt Clip Explained

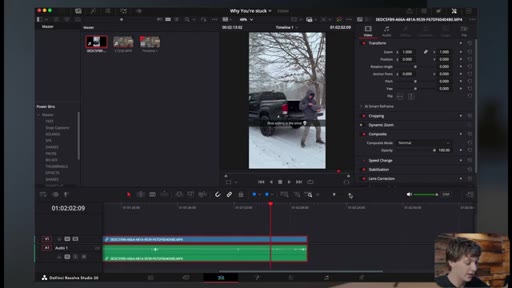
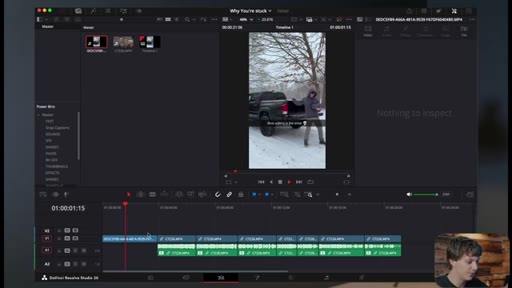
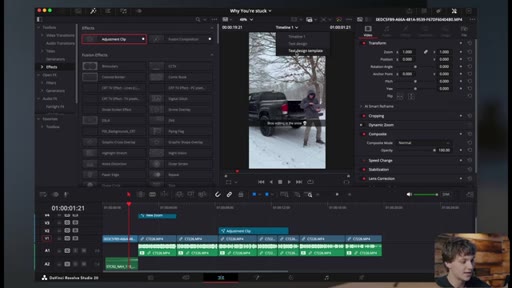
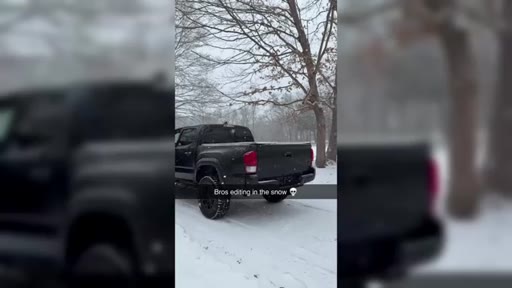
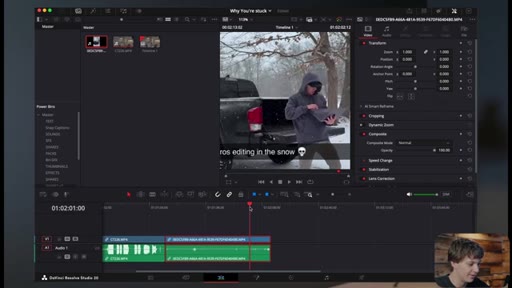
Shows the Snapchat snow-editing clip; explains why absurdity stops the scroll; sets the four-second rule.

01:55 – 03:40

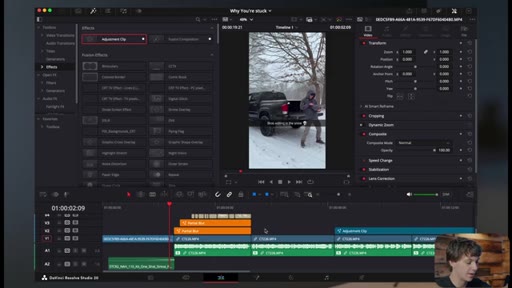
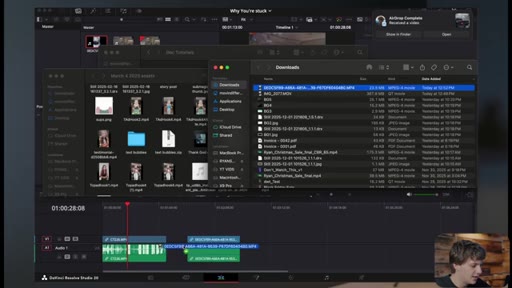
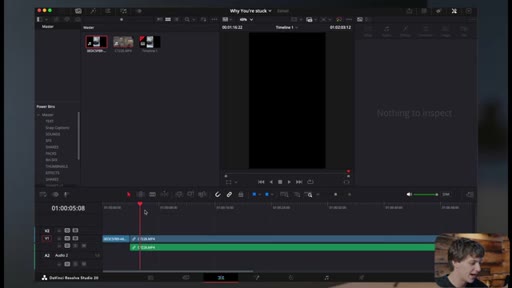
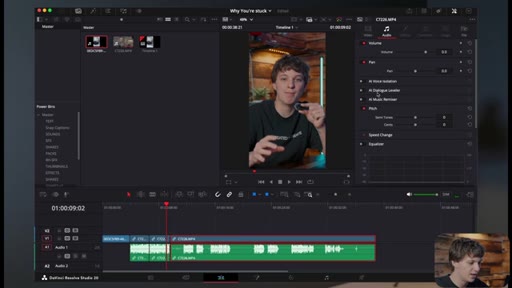
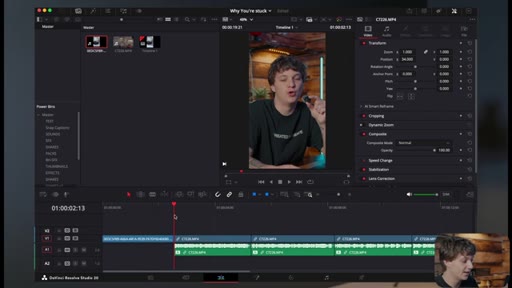
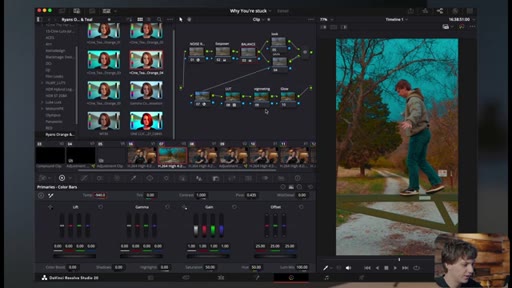
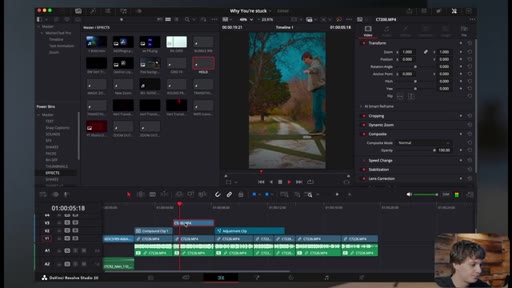
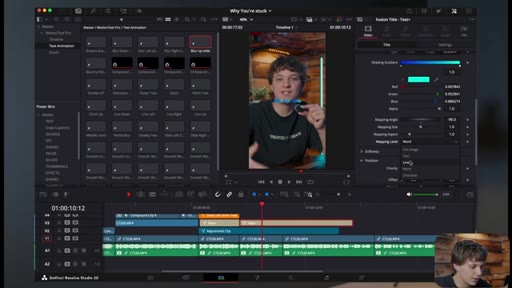
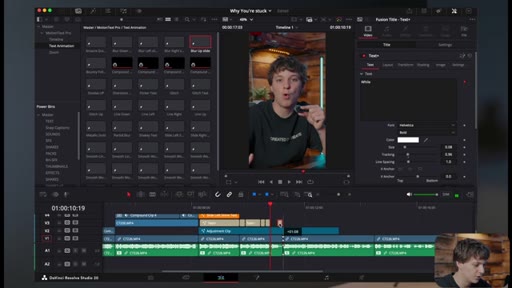
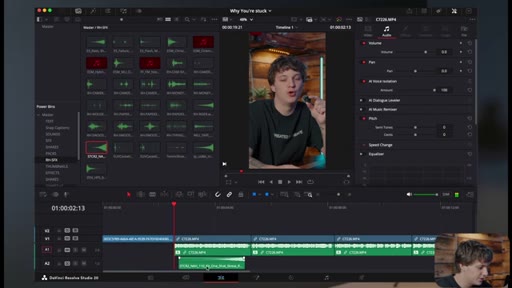
03 · Import, Trim, and Basic Edit

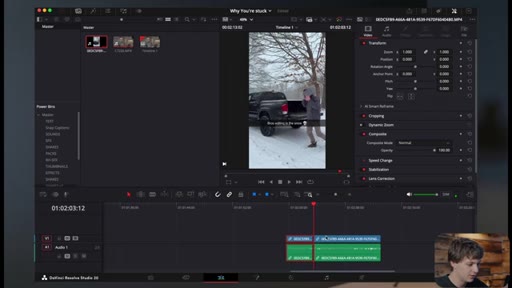
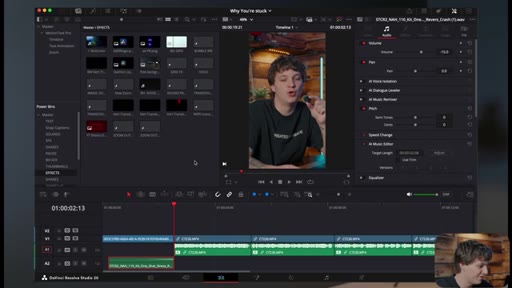
Drags footage into Resolve, trims the bolt clip, unlinks audio, centers frame, applies LUT color grade, enables voice isolation.

03:40 – 05:10

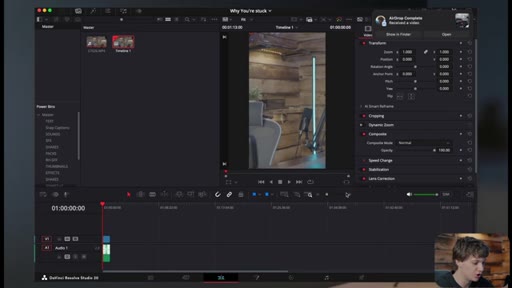
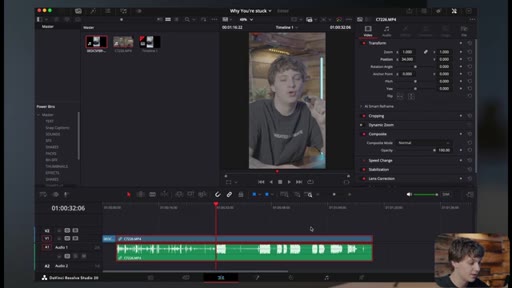
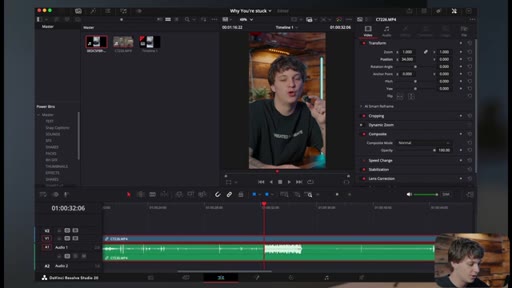
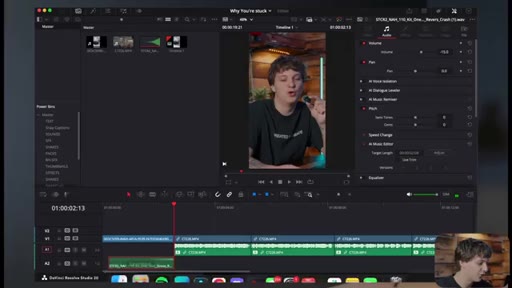
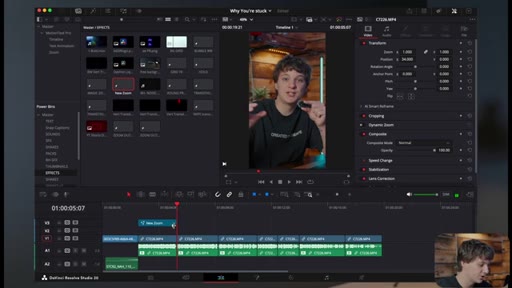
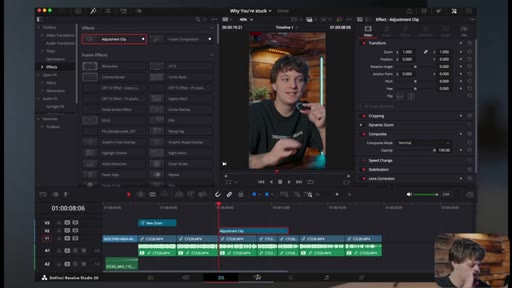
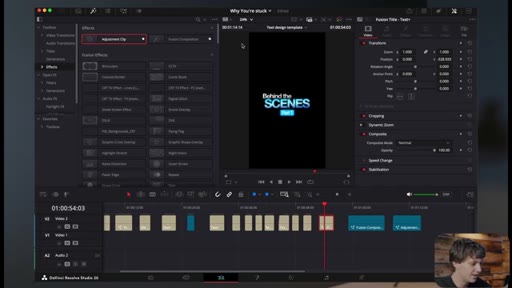
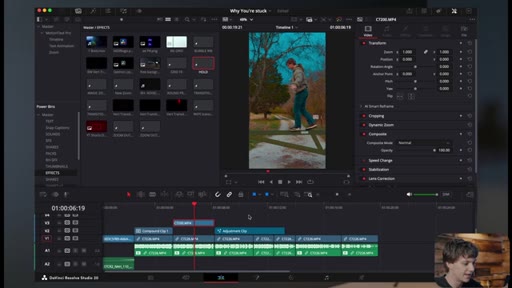
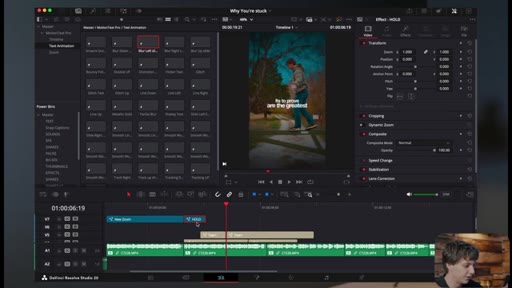
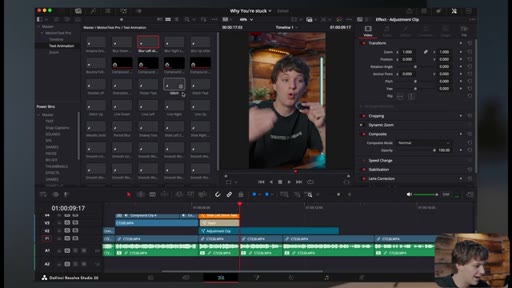
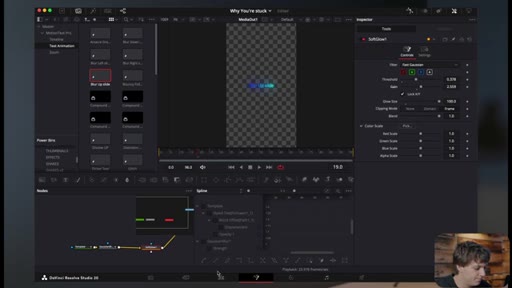
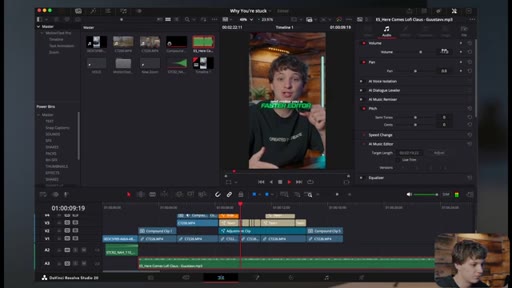
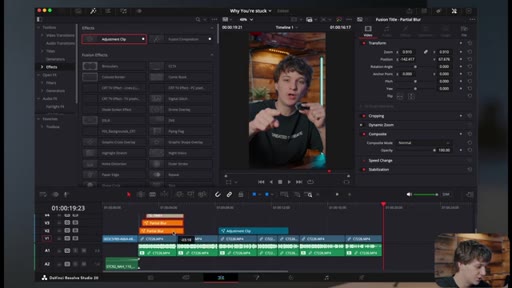
04 · Riser + Zoom Transition

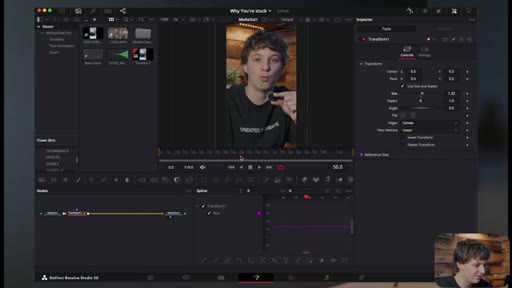
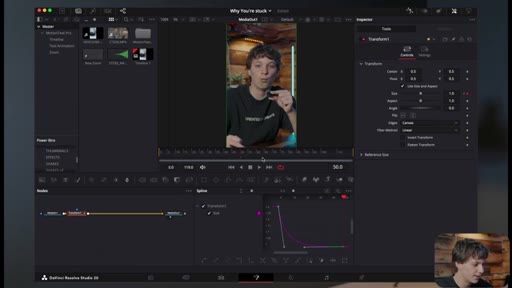
Adds a riser sound effect at the bolt-to-main cut; builds a punch-in zoom via adjustment clip and Fusion page Transform node with out-cubic keyframe easing.

05:10 – 08:10

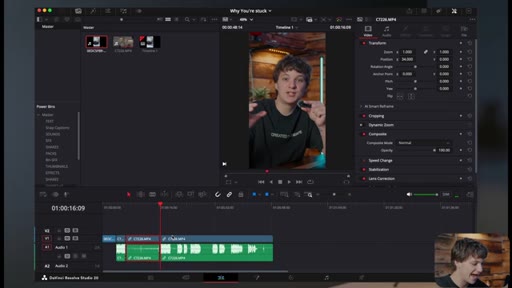
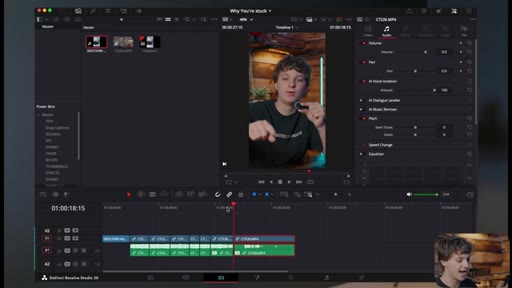
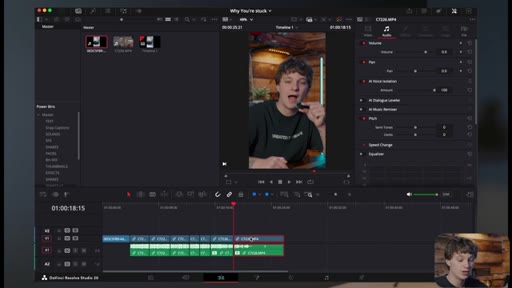
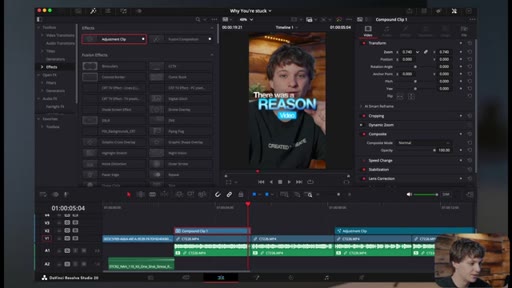
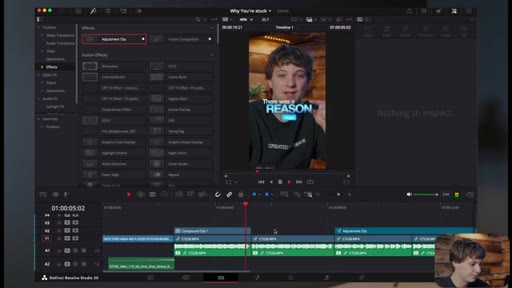
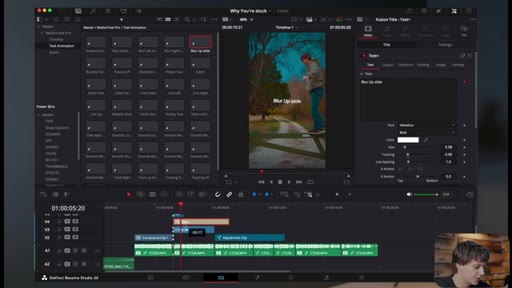
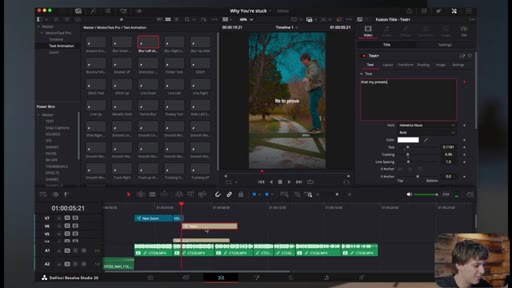
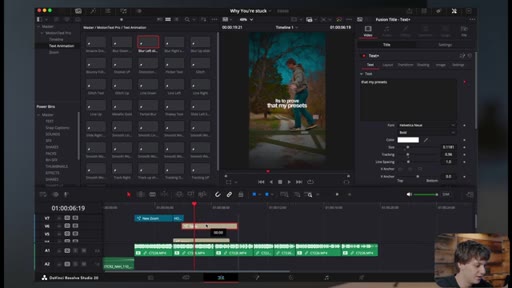
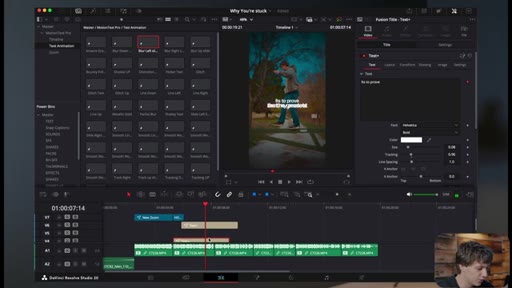
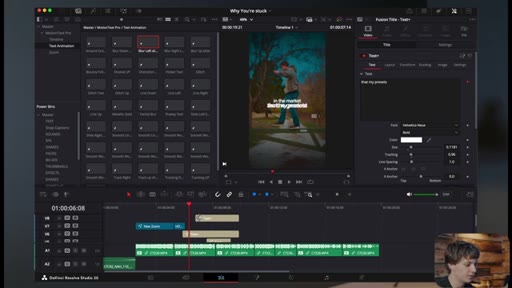
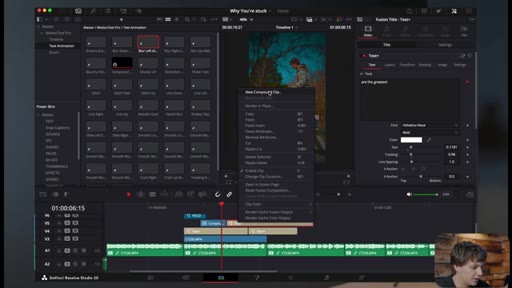
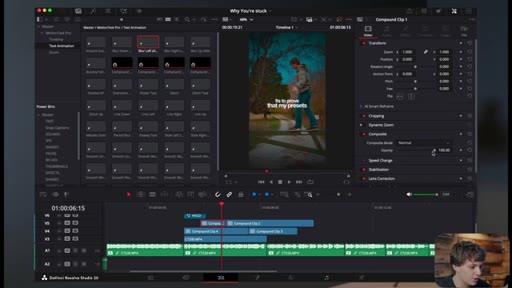
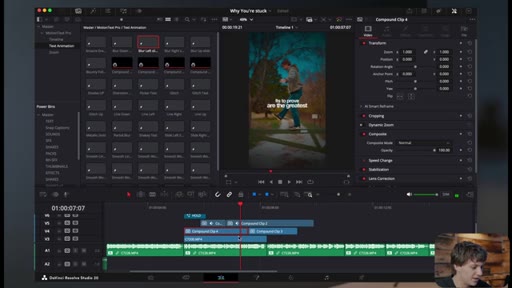
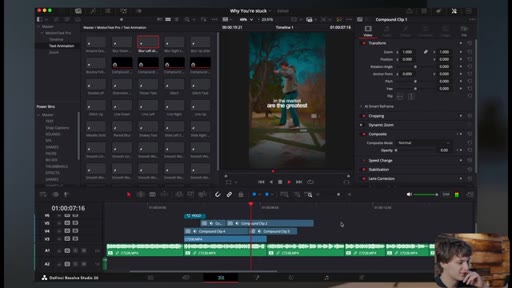
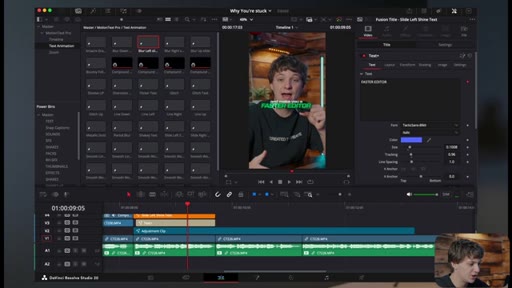
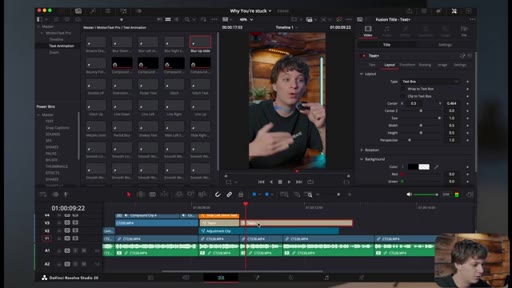
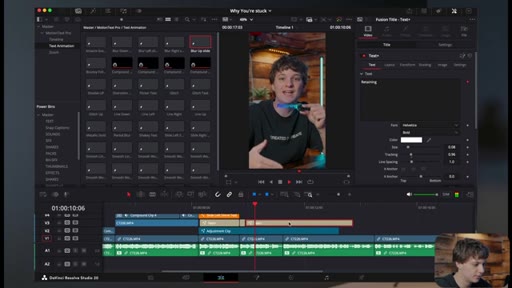
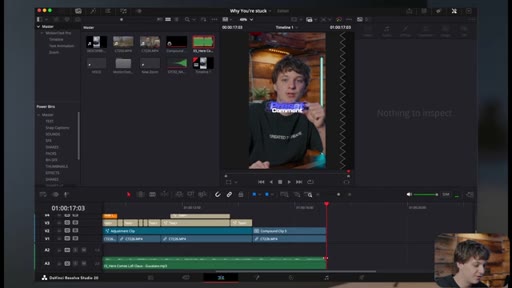
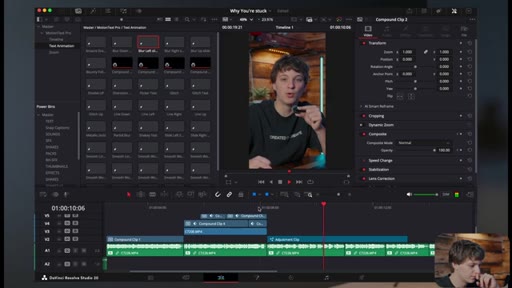
05 · MotionText Pro Captions

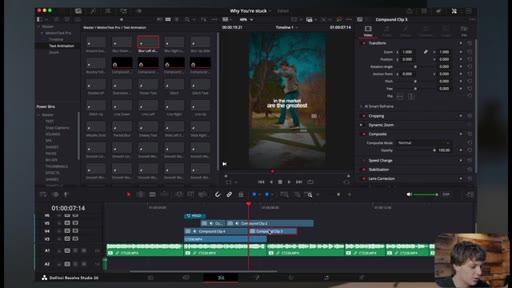
Grabs preset caption animations from MotionText Pro, positions them over the main clip, groups into compound clip, adds dynamic zoom b-roll.

08:10 – 08:44

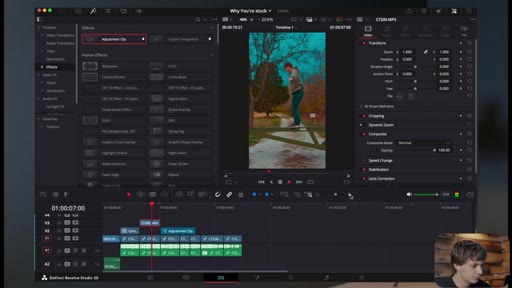
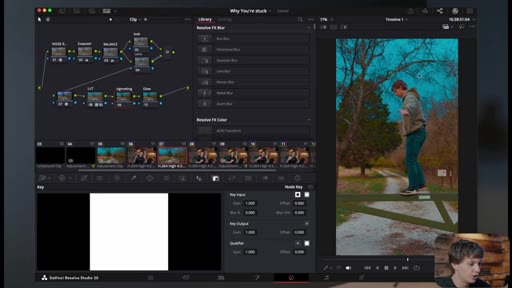
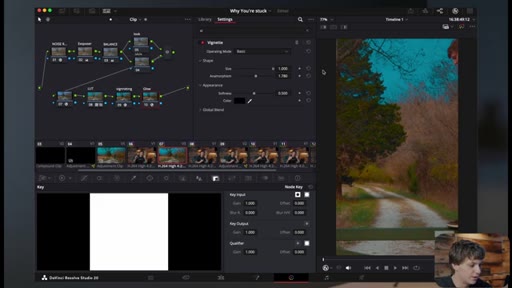
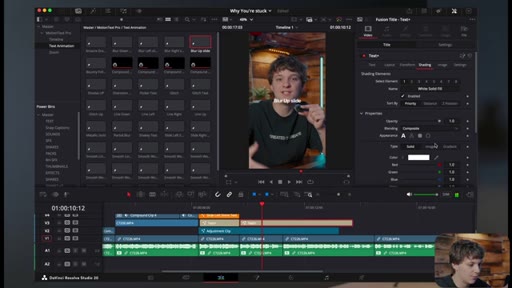
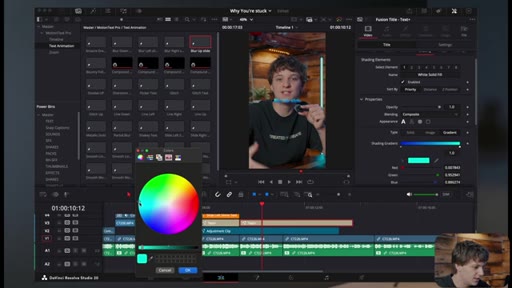
06 · Color Page: Radial Blur + Vignette

Switches to color page, adds radial blur keyframed at clip start, adds vignette with keyframed size to create a cinematic entry.

08:44 – 10:22

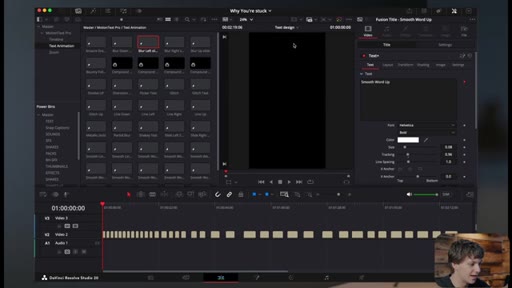
07 · Glitch Text Effect

Builds animated word stagger from three compound clips with offset opacity keyframes cycling down and up.

10:22 – 11:26

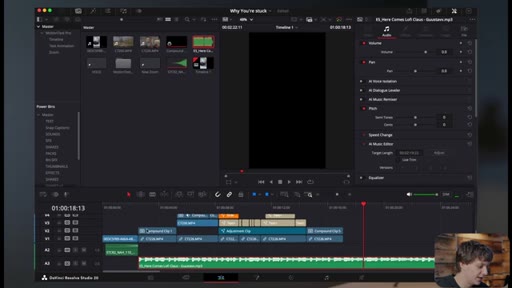
08 · Music Bed + Final CTA

Adds lofi Christmas music bed, fades out, recaps bolt method and riser tip, calls for comment video ideas.

§ · Storyboard

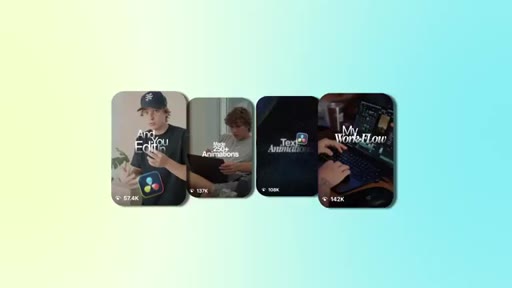
Visual structure at a glance.

reel gallery hook
DaVinci + REPLICATE title
bolt clip in Resolve
effects panel / adjustment clip
MotionText Pro preset panel
color page / radial blur node
glitch text compound clips
creator wrap / CTA
§ · Frameworks

Named ideas worth stealing.
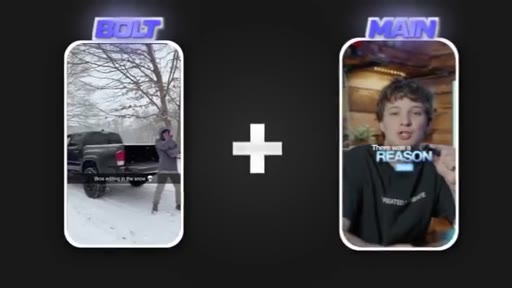
00:46 concept

The Bolt Method

Place a raw, lo-fi clip (under 4 seconds, filmed on Snapchat or similar) before your polished main content to interrupt the scroll before the viewer has made a skip decision. The bolt clip should be absurd or unexpected enough to register as non-content.

Steal for any Reel or TikTok where the polished hook is not stopping the scroll on its own
§ · Quotables

Lines you could clip.

00:46
"It's a simple method that you put in front of your video, and I like to call it a bolt."
Coins a memorable named concept in one sentence with no setup needed. → TikTok hook
01:23
"Who is editing in the snow with their laptop like this doing some goofy movements."
Explains the psychology of the bolt method in one visceral question. → IG reel cold open
03:11
"Try to keep it under four seconds the beginning."
Concrete, actionable rule — extractable without any context. → newsletter pull-quote
§ · Resources Mentioned

Things they pointed at.

03:39productMotionText Pro preset pack
02:10productCreator LUT pack
03:40toolRiser sound effect (free)
00:50linkFree b-roll footage
§ · CTA Breakdown

How they asked for the click.

03:39 product
"Grab my presets, all my text effects, all my stuff that I'm gonna be using in today's video down the first link down the description below. Running a fast sale right now for the month of December."

Multiple mentions woven into the edit walkthrough rather than a single isolated pitch block; the preset pack is demonstrated live as the primary teaching tool, making the CTA feel like a natural extension of the tutorial.

§ 04 · The Script

Word for word.

HOOK opening / re-engagementCTA the pitch
00:00HOOKAll the reels you're seeing on screen right now all blew up in a niche specific area for one reason. Now I'm gonna expose that exact reason in today's video. It's a simple method that you put in front of your video, and I like to call it a bolt.
00:12HOOKNow, have a b tested this literally 10 plus times and the bolt method works a 100% of the time. I'm gonna show you in today's video and also be going over how I'm gonna edit the video as well. Let's hop straight into DaVinci Resolve.
00:22HOOKCool. So guys, we're in DaVinci Resolve and I'm gonna actually leave the free footage down below that I'm gonna be using in today's video. So anyways, we have the main footage which is just me actually talking and doing the reel.
00:32HOOKAnd we're gonna go over what actually makes it go viral. Now you guys clicked on this video to see how I actually get the reels to go viral. So we're gonna be going over that section first.
00:40HOOKBut I'm also gonna be going over how I edit viral reels in DaVinci Resolve two as a little bonus for you guys. You're probably wondering, what even is the bolt method? Essentially, we're taking a video that is catching the viewer off guard that are that is scrolling on IG reels, which I like to do a video off of my Snap chat.
00:56HOOKSo I take my phone, I film a video on snap chat of me doing whatever I'm doing, which will go into depth on what you should be doing in the video, and then it transitions into the high quality video. I'm gonna show you exactly how I do it all here in DaVinci Resolve. Now I'm gonna drag in what's what I like to call the bolt on, and what I did was I essentially filmed myself editing in the snow.
01:15Now why this is strategical is because who is editing in the snow with their laptop like this doing some goofy movements. So in the video, I did some really goofy movements like whooshing the snow around and all I did was I slapped on bros editing in the snow with the skull emoji.
01:32And I did that all through Snapchat by the way. Okay. So that's as simple as it's gonna get, and now we need to find a good point and we need to keep this between five seconds.
01:40Now this is what's gonna make the video go really viral. So so we're gonna start off with with me right here. I think this is a pretty good point right here.
01:48We're gonna cut the footage right there. We're gonna play this through. Boom.
01:55I think that's really good right there. It's it's just it's kind of like comedy and we're just gonna unlink these clips so that we could take away that audio and then it's gonna transition into our actual clip. So now what I have to do here is come in here and center myself because I made this as long form content.
02:13Okay. And then we have to simply just color grade my footage which I do have some LUTs down below if you guys want to grab those. It's just a simple color grade process.
02:21Okay. And then I'm just gonna simply cut this too. There was a reason I was out in the snow editing this video.
02:26I'm just gonna cut this up really quickly. So just using the slash and then shift delete button. It's to prove that my presets are the greatest in the market.
02:34So my mic settings are kinda cooked so I'm gonna come to voice isolation and apply these to all these clips because I realize that it probably needs it. Now obviously I edited this video in under ten minutes in the snow is obviously a marketing tactic that I did in the video because obviously I'm not editing in the snow.
02:51I'm just explaining to them that yo, these presets that I'm using to edit this video took me ten minutes to edit this video and you guys will see it will take me ten minutes. The video is literally only like twenty seconds long. So this is what it's looking like so far.
03:03So it's me in the snow. Right? It might even be too long.
03:07I might even start it like right here. So boom. Boom.
03:11And then just cut it there. I think that's good. I think it's two seconds long.
03:14Try to keep it under four seconds the beginning. Okay? And then There was a reason I was out in the snow editing this video.
03:20It's Now there are gonna be a few techniques that we're gonna do to do this transition. So you guys came here to see how I get the viral reels is exactly how I do it. So I literally start with this thing in the beginning and I've done this like literally 10 plus times.
03:33CTAAnd so we have these sound effects that I wanna use in today's video. So I like to use this like swoosh sound effect that's like riser buildup.
03:41CTAYou can find risers for free online. Just make sure you turn it down to like negative 15. Or you can grab my presets, all my text effects, all my stuff that I'm gonna be using in today's video down the first link down the description below.
03:52CTARunning a fast sale right now for the month of December. But anyways, we're gonna have it.
03:56There are gonna be a few things, so I do have this preset pack. So MotionText Pro will spawn up here. And so I actually have some cool effects that I will be
04:06using. So let's say I wanna slap this one right here. There was a reason I was out in the snow editing this video.
04:12So that's just a quick zoom and I can show you guys exactly how I did that while we're here I might as well give you the sauce. We're gonna come to the adjustment clip and we're gonna put it on the beginning of our clip. We're going to take go to the fusion page,
04:23hit shift space for a transform node. We're going to size in, hit a keyframe, and then go like 50 frames forward and just go back to 0.5 or actually I think it would be you go back to one.
04:36That's what you would do. Come here to the zoom to fit and then just hit command a and then just go to easing and then out cubic and then we're gonna pull these arrows to like right here so that way when it Simply to prove that presets can speed up your work boom.
04:51Just like that. Something like that. Nothing nothing nothing too too deep.
04:55Now like I said in the MotionText Pro pack I'm going to grab one of these text title fonts right here. I'm literally just gonna copy this hook that I made and I'm just gonna copy it into my exact video.
05:08So we're gonna come here. We're gonna copy this sucker into my video. So this is what I meant by it takes me ten minutes to edit the video because now I'm already done with the hook.
05:16So boom. There was a reason I was So now I cut those and then we have a hook already just by using my presets. There was a reason I was out in the snow editing this video.
05:24So now the only thing I'm gonna do just to make my life easier, group these together, create it as a compound clip. And since this is the ending, I'm gonna size this down and just honestly reposition it because I don't like where it is. So now It was reason I was out in the snow editing this video.
05:39It's to And I'm gonna go as far as using some b roll too. Like I said, I will leave this footage down below. So editing this video.
05:45It's to prove that my presets are the greatest in the market. It's Now to get this zoom out that I'm showing you right now just hit the dynamic zoom. Now I do notice in my coloring right here that is way too blue.
05:58So I'm gonna come to my LUT and I'm actually just gonna turn this sucker down just by like doing this. So just like that. Now we turn that down.
06:05Boom. So we're actually gonna make this look really cool by coming to the color page and going to a complete different node.
06:13Go to effects and search for the radial blur. Right when the clip starts hit a keyframe, go forward that my pre and then and just turn up the radial blur. That way it's a little blurry.
06:22Then we're gonna go as far as coming back to the beginning, grabbing a VIN yet, slapping that puppy on there, and then turning down the size or up the size.
06:32Sorry. Hitting a keyframe, going approximately when the blur starts to come in.
06:39So right about there and then just turning that size down a little bit. Now, obviously, we can make it look a little bit like that. Now there's a reason we're gonna do So boom.
06:46Video. It's to prove that my presets are it's to prove that It's really simple. I'm just gonna grab
06:52some cool text title animations. So this one right here, this is all MotionText Pro. So boom.
06:58It's to prove
07:02Then we're gonna drag in the left one that my preset. We're gonna put that one below
07:08just like that. It's to prove that my preset. Then we're gonna take this one above.
07:13We're just gonna duplicate it and then I'm going to cut that there. Are the Are the greatest. Greatest in the Greatest
07:20Then we're gonna take this one, duplicate this one. And what we're gonna do here is a cool trick. I'm gonna cut this one here.
07:27I'm going to then Presets are the cut this one here just like so.
07:34Now we're gonna bring these down. Now they're all flush. You could go as far as bringing all of this down to make it all organized.
07:41But basically what I'm gonna do here is I'm gonna come to this right here. I'm going to create it as a compound clip each every single clip. Boom.
07:50Boom. This is just what I were to do if I were editing the video. So now I have all these different compound clips.
07:56We can turn the opacity down. So when a keyframe the opacity, go two frames forward, go down, go one frame up, and then turn it all the way down.
08:05Reset Then we're gonna take this one, have the the opacity down,
08:11keyframe it twice, go up, keyframe it twice, go down, go up, go twice over. Great. Just like that.
08:18So now the greatest And then we're gonna do the same thing for this side. So we're gonna keyframe it.
08:23Boom. It goes down, goes back up, goes down,
08:28goes down. Now this one, we're gonna keyframe to already be down. Go a few frames of forward.
08:35Boom. Boom. So now if we put that through Eye presets are the greatest in the market.
08:39It's simply to So now we just had that glitch effect. Presets are the greatest in the market. Perfect.
08:45Forget. It's simply to prove that presets can speed up your get. It's sim
08:49Cool. Now we're just going to go back to text design template. We're gonna grab this one because I like the way it's looking.
08:55Go back to timeline one. Copy it in and bring it back over to this. It's simply to prove that presets can Boom.
09:02And make you a faster editor. You a faster ad You can actually change the color of that, but look at how crispy and clean that looks. And to make you a faster editor.
09:10Editor. And I'm just going to go ahead and grab up just another simple line up. Probably just grab this one right here.
09:17I'm actually just gonna drag down backup blur up. And this time we're gonna come to shading and go to gradient. And I'm going to make this a dark blue
09:27and then make this one a kind of teal, something looking like that. Then we're gonna come to mapping angle and go to negative 90. And then we're gonna come to mapping and go to line.
09:40Then we're gonna come into the fusion page with this blur up slide, and I'm actually going to make the the glow look a little better. That way you see it.
09:49It looks a heck of a lot better. Actually gonna pull that down right there. So boom.
09:54So wall. So we're gonna type that out.
09:59While Retaining Retaining.
10:07The same. Same. Same.
10:12CTAWe're gonna duplicate that animation back over here. Then we just added one last little thing, but I do wanna come on here and just go back to the original point as to why I made this video. Make sure you're adding those sound effects, the riser sound effects which you can find for free.
10:26CTAActually, will leave a riser sound effects down below for free for you guys. And then most importantly, guys, you are gonna need a good solid audio. So I'm actually thinking about going for a Christmas vibe and I actually do wanna come in on a beat, so I'm gonna bring in this beat.
10:39CTABoom. There was a reason I was out in the snow editing this video. It's to prove that my presets are the greatest in the market and make you a faster editor while retaining the same quality.
10:49CTASo I edited this video in the snow in under ten minutes and so can you. I'm a preset to get the exact presets that I use. Boom.
10:55CTAThen we're gonna cut it off and then just fade it out just like that. And just like that, guys, you have a viral video ready for you to go. I'm gonna post this on IG.
11:03You guys can check out the results down below. It'll be posted on IG by the time I post this YouTube video. And you guys can see for yourself how the video is doing.
11:09Thank you guys for watching this video. So if you guys are seeing this, you're watching me till the end, comment some video ideas down below that I can maybe post for you guys. If you guys have been wanting me to post a YouTube video specifically,
11:17maybe now is the time I could do that specific video. Thank you, guys. Have a blessed day.
11:21Just remember, guys, the Lord and Savior, he saved me. He could save you too. Peace out.
— full transcript
§ 05 · For Joe

Stop the scroll before your hook even starts.

WHAT TO LEARN

A four-second lo-fi clip placed before a polished Reel interrupts the scroll at the feed level, before the viewer has made any judgment about the main content.

  • A pattern-interrupt clip filmed casually on Snapchat reads as organic to the feed and to the human eye, buying the polished content that follows a fairer viewing chance.
  • Four seconds is the maximum for the bolt clip; shorter is better because the interruption loses its surprise quality the moment it starts to feel deliberate.
  • The riser sound effect at the bolt-to-main transition signals a gear shift in energy and resets viewer attention — the audio does what a title card would otherwise do.
  • Voice isolation in DaVinci Resolve should be applied as a default habit on outdoor or ambient-noise clips, not saved as a rescue step after the edit is assembled.
  • The adjustment clip zoom-in on the Fusion page (Transform node, size in, keyframe, return to 1.0, out cubic easing) is a free built-in punch-in that replaces most paid zoom plugins for Reels work.
  • Grouping text animation layers into compound clips before keyframing opacity reduces timeline clutter and makes the glitch stagger effect repeatable across multiple lines without rebuilding it.
  • The glitch text effect is three compound clips with offset opacity keyframes — no plugin required, works on any DaVinci Resolve Studio installation.
  • A radial blur plus vignette combination keyframed at clip entry adds cinematic texture to lo-fi source clips using only native Resolve color page tools.
§ 06 · Frame Gallery

Visual moments.